A fellow trainer asked me some questions about my remote training setup, especially:
- The technical setup (hardware and software)
- How I keep the training interactive, even though it is remote
So, here is my setup and how I currently run those trainings…
Computer, Dock and Screens
I use a Surface Book 3 connected to a Samsung Ultra-Wide Screen via a Surface Dock 2.
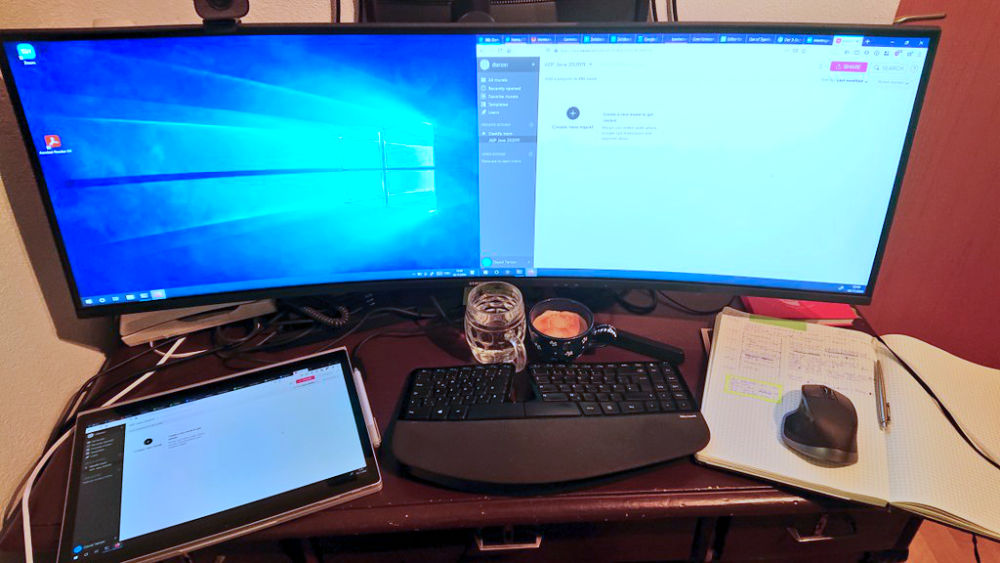
Now, this sounds like quite a lot of advertising for companies and products, so, why am I telling you those specific product names? Because of the touch screen, the pen and picture-by-picture.
I need a touch screen for my trainings because I draw a lot of picutres. I always did that, even when we still had trainings where we all sat in the same room.
In the past, I used a Surface Pro 4 with Surface Pen to draw, present and code. But the model I own has not enough RAM and not a good enough processor to do all that in a Zoom meeting with the camera on. So, I switched to a Surface Book.
I use my ultra wide screen in picture-by-picture mode (PBP). So, for the laptop, it looks like there are two screens. Sharing an ultra-wide screen in a video conference is not a good idea, because the other attendees would have a hard time seeing anything. But in PBP mode, I always only share half of the screen.
Bonus points: I can run zoom and other programs on the second half that I will never share.
The screen of the Laptop is mirrored to one of the two halfs of the large screen. This is the screen where I am running my slides and also the screen that I share with the other attendees. So, I can draw on the screen of the laptop. And then, while I explain this drawing in more detail, I can look at it on my “normal” screen.
You could achieve the same result with 2 monitors, I just find the PBP a little bit more comfortable. Also, the (relatively) low resolution of the ultra-wide screen (2x 1920x1200) makes the shared screen easer to read for the other attendees compared to a 4K screen.
Aside When Rene, Jon and I did the Advanced TDD for iOS with Swift Training, we had a remote warmup day. Rene and I also wanted to be able to quickly draw something and have multiple screens, so we connected an iPad Pro to a MacBook that had a big screen attached. This setup worked pretty well too, but I think my current setup gives me an even more seamless experience.
Other Hardware
I searched for some time until I found a mouse and a keyboard that I like. We are using those for so many hours a day that it pays to invest in great hardware here.
Also, as you can see if you look closely at the picture above, there is a webcam centered over one half of the screen - the half that I never share. This means that while I present something, I do not look directly into the camera. But when the attendees are working and I support them (which happens much more often - remember, training from the back of the virtual room), I look into the camera while I watch their video streams.
But the most important piece of other hardware is:
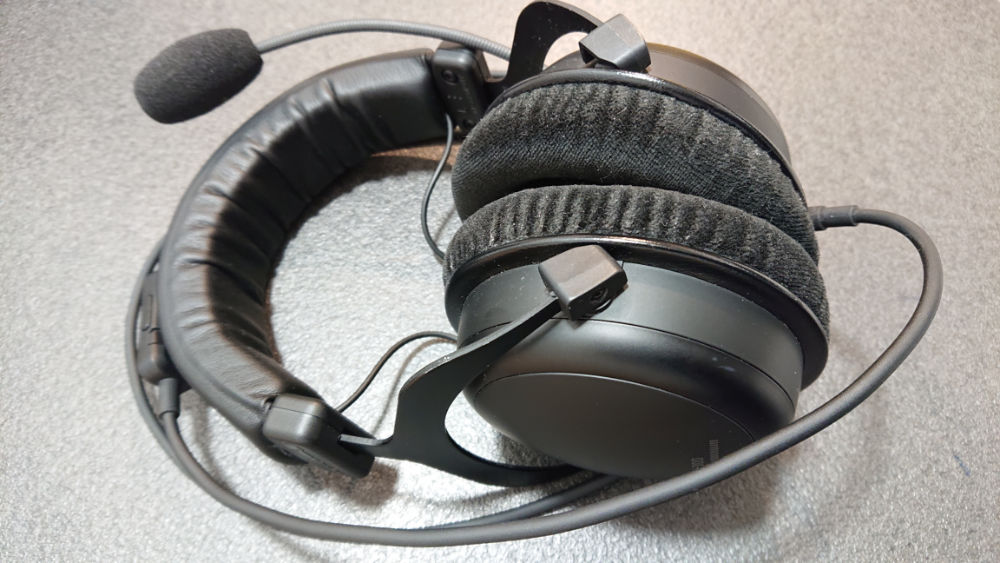
A great headset. I use a Beyerdynamic MMX 300, but the exact model does not matter so much. What was important to me is to have a headset that is really comfortable to wear and that produces a decent, even nice, sound.
There are some days where I am wearing this headset for 8 hours or more, so something that doesn’t fit well or doesn’t sound nice would be a complete desaster.
So, why am I not using a good microphone and no headphones at all? I even own a pretty decent USB-mic for recording the videos that I sometimes publish…
Well, not using a headset works most of the time these days. But sometimes, you still get some ugly feedback or don’t hear the others while you are talking or have background noise or some other problems. And that’s not something I want to have in my trainings or video calls.
Interactivity, Goals and Schedule
I use a paper notebook to plan each day (or, in the case of a training that I currently teach, each half-day)—at least as a rough outline:
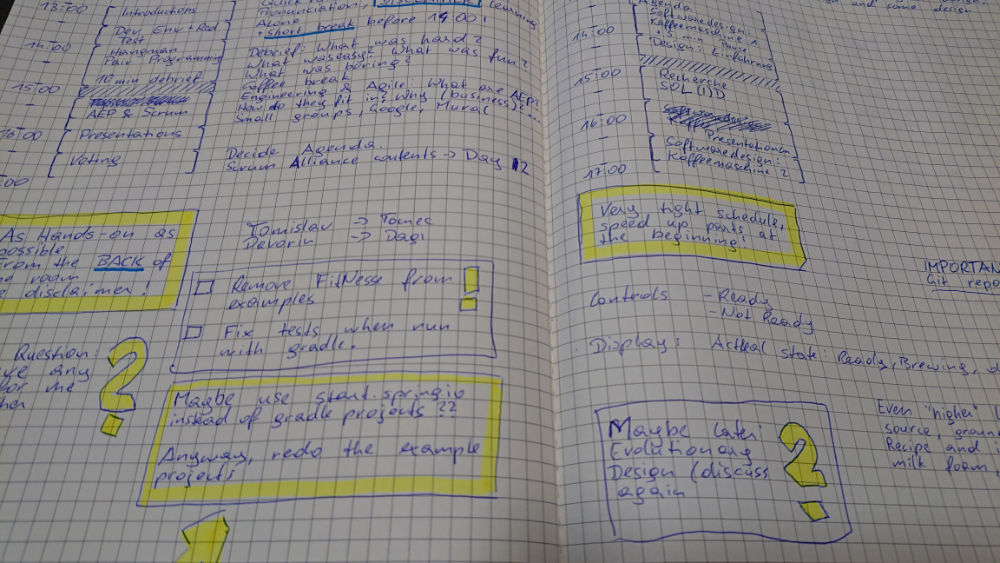
What you see in the picture above is the cleaned-up version. When I am preparing a completely new training, I usually have a few pages with doodles, ideas, schedule variants, … before those pages.
I use this schedule to keep track of the time—and especially of the breaks—during the training. And I also use it to write down notes—ideas for later trainings, things that worked well, stuff I want to remember for later in the same training, problems that occured, how to call the attendees if the prefer certain nicknames or pronouns, …
I think that breaks are even more important in an online training than when we are all on site, because people sit even more and it is harder to concentrate when you stare at a screen for the whole time. So, I plan for a long coffee break and several shorter, five-minute breaks in each four-hour block.
I also write down a learning goal for each day—something that attendees should be able to explain or do after we finish the half-day.
And I use this schedule to plan for interactivity: I write down
- what attendees will do to learn—prepare a short presentation, discuss software design on a (virtual) whiteboard, pair program, review results of other pairs, …
- how I support them—show some slides at the beginning, ask questions while they are discussing, facilitate a discussion, answer their questions, …
In some cases, I write down many details about what I am trying to do. And sometimes, if I did this lesson before and it worked well, I might just write down the name of the activity.
Slides, PowerPoint and Drawing
When I wrote about my hardware setup, I mentioned that I need a touch screen and a digital pen. I need that because I draw and write on my slides.
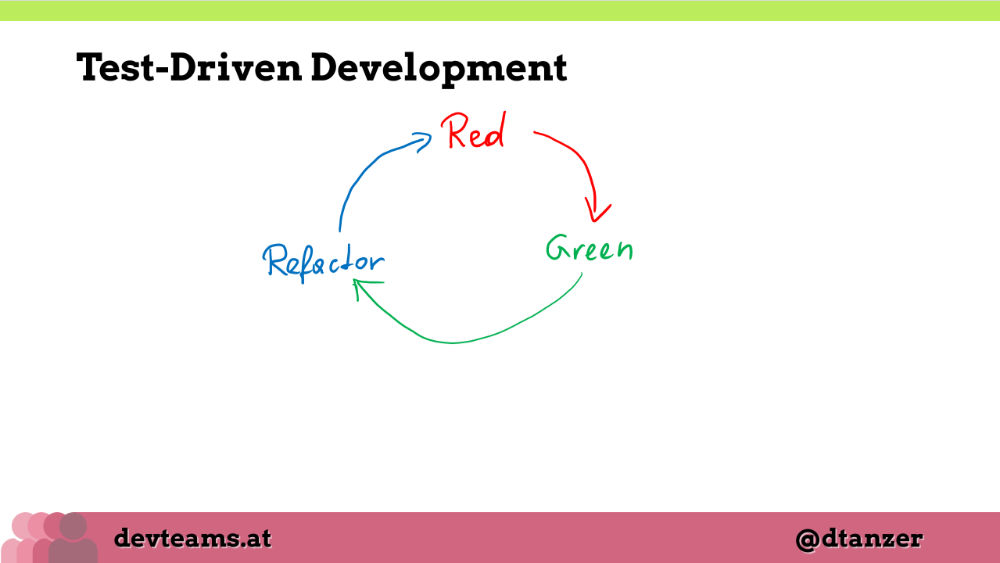
In the slide above, I drew the illustration of the “red-green-refactor cycle” during the training.
I used to do that with a dedicated drawing program (there are some on the windows store). But I found out that preparing some half-finished slides in Power Point and then using Power Point’s own drawing tools to expand on the content there works better for me. Even though those drawing tools are not as sophisticated as a dedicated sketching program.
So, why don’t I prepare all the content?
Drawing the slides during the training forces me to slow down, and past attendees told me that this made it easy for them to follow the content. Also, it makes it easier for me to make the slides more context-specific: I can add the content that I think this group needs right now.
And if they have a question, I can just insert an empty slide into the slide show and start drawing the answer.
In on-site trainings, I draw lots and lots of flip chart pages. When I teach online, Power Point is also my flip chart and my white board.
Having said that, I am still trying to use slides sparingly. Attendees learn more when they perform some activity themselves.
Software Setup
My preferred video conferencing software for doing remote trainings is Zoom—because it gets breakout rooms right. And breakout rooms are crucial for remote training. I use Microsoft Teams with another client where I do regular technical coaching. It works very well for almost all purposes, but quickly breaking out into smaller groups is so much of a hassle that we just don’t do it.
Why do I even need breakout rooms? I need them to make the training more interactive. To be able to work more from the back of the room. Many activities are more effective or more fun in smaller groups. And comparing notes after the breakout sessions can lead to interesting discussions and questions again…
For the activities and for quickly sharing links, quotes etc. I also need chat as a secondary channel. Sometimes I use the chat feature of the video conferencing tool. But if, during preparation, I think that we might use chat extensively, I invite everyone to a dedicated Slack channel.
I recently discovered Mural as a collaborative whiteboard. It does not work very well for freehand drawing (more like, not at all, at least with my touch screen and pen). But it works very well for working togehter using mouse and keyboard.
One can add virtual sticky notes to the screen, group and move them, add frames and borders, connect items with lines and arrows, etc. And that works very well even with large(ish) groups.
So far, I have used Mural for brain storming, retrospectives, structuring ideas, small group presentations. And I have even already used it for software design sessions, where we agreed on different types of stickies and arrows having different meaning.
When we work on code, we collaborate using git.
In the past, I tried to use remote controlling a computer for pair programming and ensemble programming (formally known as mob programming). While switching the person in the “driver seat” is really easy using remote control, it does not work very well overall:
- Network lag makes it hard to know what you have already typed, especially when you try to fix typos and other errors
- Most of the video conferencing tools I tried so far have problems when you try to remote control a computer with a different operating system or keyboard layout (try inserting a curly bracket when you remote control a Mac from a Windows machine).
So, we use git to switch the driver seat: After 7-10 minutes, the person typing commits and pushes, the next driver pulls the code and continues typing. This is basically the process Simon Harrer et al have described here.
Interactivity While Remote
In the book “Training from the Back of the Room”, Sharon Bowman talks about 6 principles that make training more effective:
- Movement is better than sitting
- Talking is better than listening
- Images are better than words
- Writing is better than reading
- Shorter is better than longer
- Different is better than (always the) same
I try to follow those principles during my trainings, and also in my online traingings. I draw illustrations on my slides and encourage attendees to draw. I ask them to create—write!— short presentations and then present—talking!— to others. I change activities—different!—so that we do not do the same thing throughout the whole day. And even during an activity, I often break the activity down into even smaller chunks (split the work, research, prepare presentation, rehearse, …).
The principle I struggle with most during online trainings is movement.
When we are all in the same room, getting people to move around is really easy. Make them fetch something they need from a table in the back of the room. Ask them to put stickies to a wall. To move to a whiteboard and draw something together. Or any other activity that makes them get up, quickly do something and sit down again.
I can control how much fresh air we get by opening the windows multiple times per hour when we are all in the same room.
But how do you do that in a remote setting?
I have read about activities other trainers are using, but I don’t feel comfortable using them in my trainings (yet). Because I think those might break the flow and feel awkward when not done well. Get up and search for something red in your house, in the middle of a pair programming session? I don’t know whether this would work…
So, the only thing I do so far is to ask people to get up and move during the breaks we take…
That’s It—For Now…
Now, what I have described here is what I use now. It works quite well for my style of doing trainings, but it is not perfect. I might change a thing or two in the future.
What do you think about it? Would you want to attend a training like this? Or are you a trainer and you work in a completely different manner? What hardware / software / activities do you use when you work together in a remote setting?
Please tell me on Twitter or via Email!
